
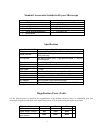
0
Owner's of the Celestron Microscope & Magnifier LCD DIgital Microscope gave it a score of 0 out of 5. Here's how the scores stacked up:
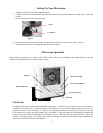
Setting Up Your Microscope
1. Take the carrying case out of the cardboard carton.
2. Carefully remove the microscope and other parts from the carrying case and set them on a table, desk, or other flat
surface.
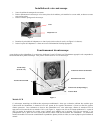
3. Remove the dust cover from the microscope.
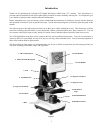
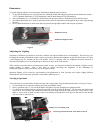
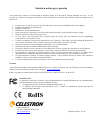
Figure 2
4. Plug the small cable from the AC adapter into the socket on the back of the base (see Figure 2 above).
5. Insert the plug end of the AC adapter into the proper power source.
Microscope Operation
Before looking at specimens you must turn the LCD on, turn on the proper illumination, and understand how to use the
mechanical stage and then you are ready to begin viewing.
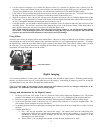
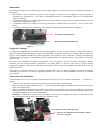
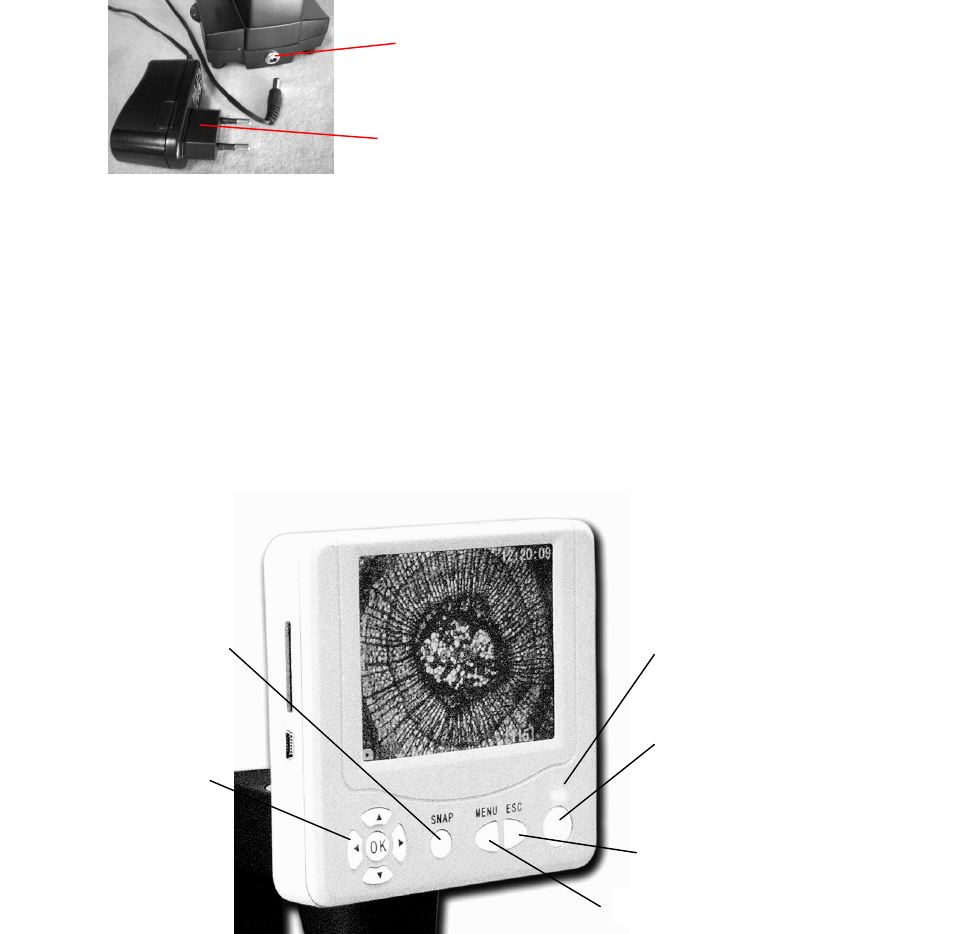
Figure 3
LCD Module
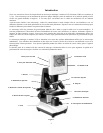
This digital microscope is different than traditional microscopes --- instead of using eyepieces to look at a specimen in
a traditional microscope, the LCD monitor replaces the eyepieces so you can look at the specimen on the screen by
yourself or share the views with others. To begin to view specimens with your microscope, you will have to turn the
LCD monitor on by turning the Power Button “On” (see Figure 3). Push the button once and shortly the Monitor On
Light (red color) will come on indicating the LCD monitor is “On”. That is basically all you need to do to use the LCD
screen for viewing specimens. The various keys on the LCD Module are mainly used for taking images (snapshots and
video) and will be discussed later in this manual.
4
Direction/OK Keys
Moni
tor On Light
Power On/Off Button
ESC (Change) Key
Menu Key
Snap Key
Socket
AC Adapter


Find Your Products By Category
- Communications
- Photography
- Portable Media
- Home Audio
- Kitchen Appliance
- Computer Equipment
- TV and Video
- Cell Phone
- Household Appliance
- Video Game
- Laundry Appliance
- Musical Instruments & Equipment
- Power Tools
- Automotive
- Car Audio and Video
- Outdoor Cooking
- Marine Equipment
- Lawn and Garden
- Personal Care
- Fitness & Sports
- Baby
Please Login
