
0
Owner's of the Celestron Microscope & Magnifier LCD DIgital Microscope gave it a score of 0 out of 5. Here's how the scores stacked up:
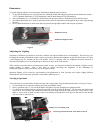
Illumination
To get the sharpest and best views, the proper illumination (lighting) must be chosen.
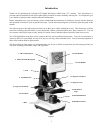
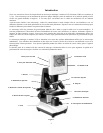
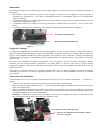
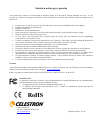
1. To turn the illuminator(s) on, see Figure 4 below which shows the following four positions on the Illuminator Switch --
- OFF, I (Bottom Illuminator), II (Top Illuminator), and III (Both Bottom & Top Illuminators).
2. The top illuminator (11) is normally for solid objects (not specimen slides) so light shines down onto the object.
3. The bottom illuminator (9) is used for specimen slides where the light shines up through the hole in the stage through
the slide.
4. Having both illuminators on at the same time can provide enough light for thick and irregular specimens.
Figure 4
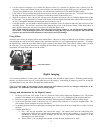
Adjusting the Lighting
Specimens of different size, thickness, and color variations will require different levels of illumination. There are two ways
to change the amount of illumination when viewing a specimen; adjusting the brightness on the dial shown above in Figure
4 and changing the EV function on the LCD monitor. The EV (exposure value for brightness) function increases or
decreases the brightness level by using the up or down arrow keys on the LCD monitor.
When viewing a specimen that is not transparent or dark in color, you may need to increase the amount of light to resolve
certain features or details. This is best done by simply increasing the brightness of the illumi
nator by
rotating the brightness control dial all the way to its highest setting.
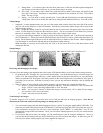
Optimum lighting will be found by experimenting with adjustments as each specimen may require slightly different
illumination as well as the same specimens viewed under different powers.
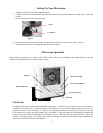
Viewing a Specimen
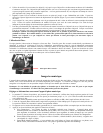
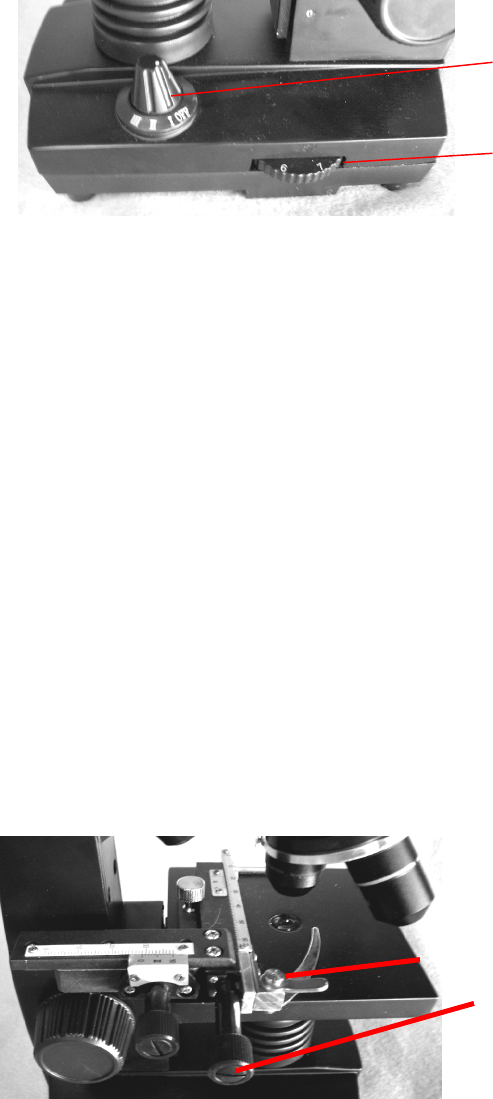
Your instrument is provided with a mechanical stage with a stage holder clamp and directional knobs –see Figure 5 below.
1. Use the clamp lever to open the clamping arm of the stage holder clamp.
2. Place a specimen slide (3” size) inside the holder and gently close the clamping arm against the slide.
3. Use the stage movement knobs to position the specimen over the opening in the stage. The rear stage movement knob
moves the X axis (forward and backward) whereas the front stage movement knob moves the Y axis (side to side).
Note: A vernier scale on both axes allows the exact marking and replication of an object in the field of view that the
user may want to come back to.
Figure 5
5
Clamp Lever & Clamping Arm
Front Stage Movement Knob. Rear Knob to the left
Illuminator Switch
Illuminator Brightness Dial


Find Your Products By Category
- Communications
- Photography
- Portable Media
- Home Audio
- Kitchen Appliance
- Computer Equipment
- TV and Video
- Cell Phone
- Household Appliance
- Video Game
- Laundry Appliance
- Musical Instruments & Equipment
- Power Tools
- Automotive
- Car Audio and Video
- Outdoor Cooking
- Marine Equipment
- Lawn and Garden
- Personal Care
- Fitness & Sports
- Baby
Please Login
