
0
Owner's of the Atdec TV Mount Atdec TV Mount gave it a score of 0 out of 5. Here's how the scores stacked up:
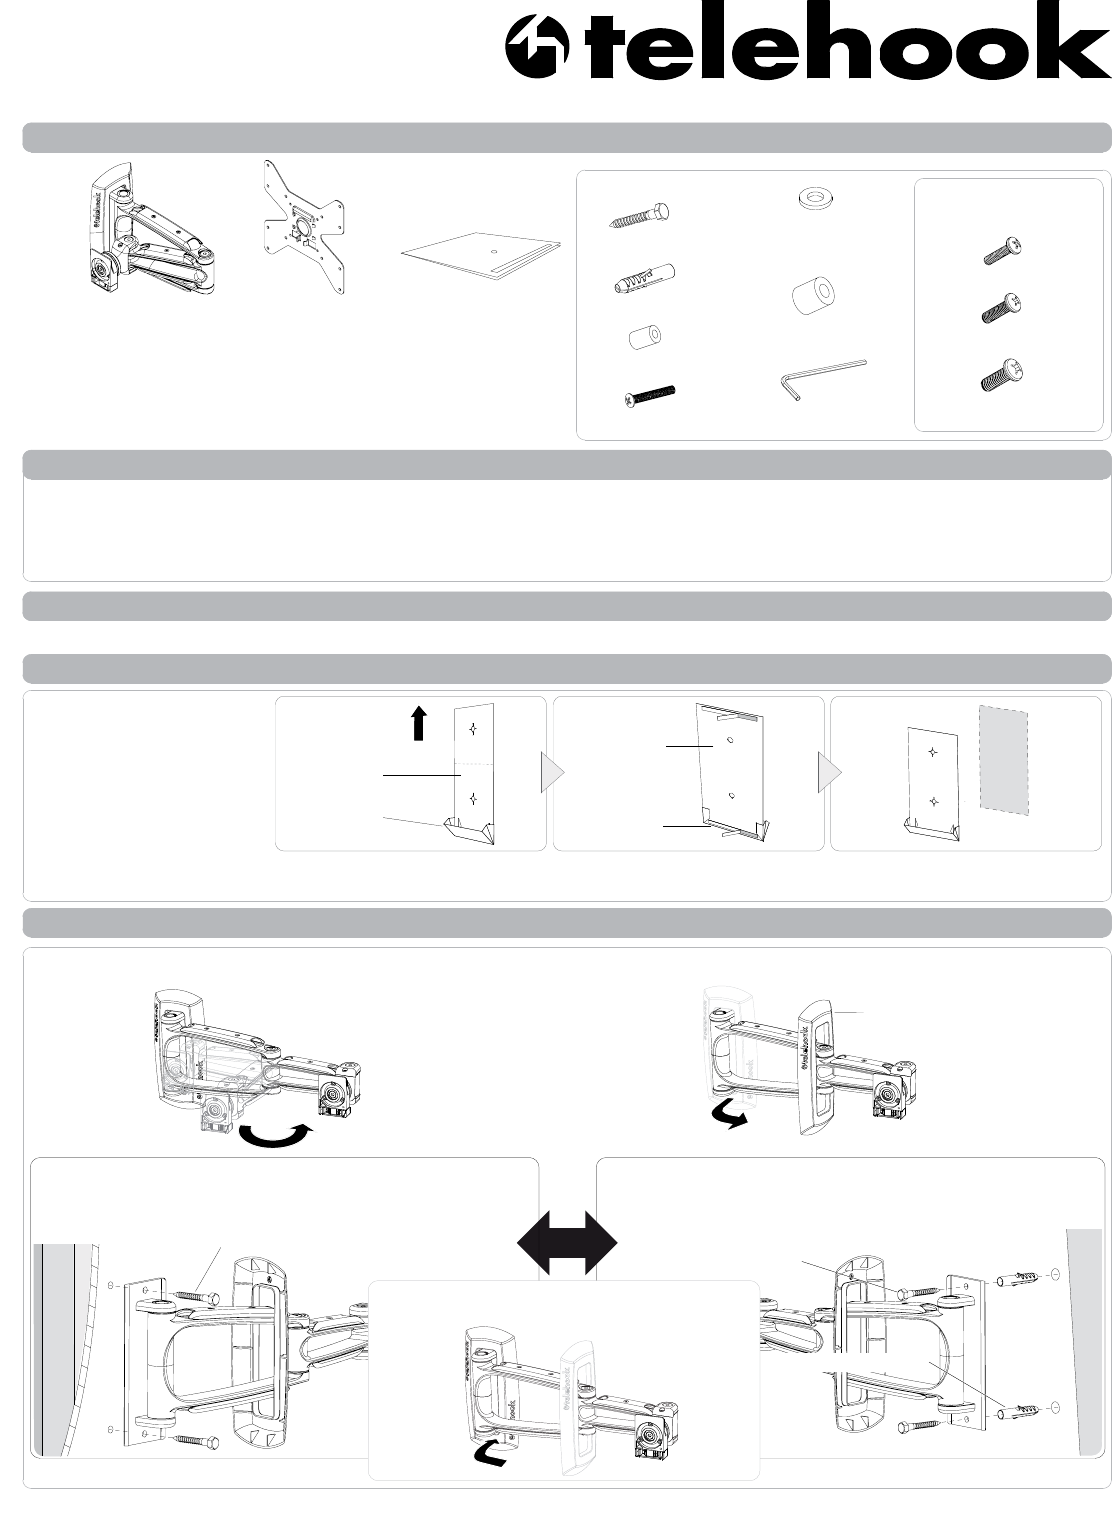
Coach Bolt (x2)
Masonry Wall
- Drill two 10mm (0.4”) diameter holes, 50mm (2”) deep.
- Secure the Mounting Plate to the wall using the Coach
Bolts and Concrete Anchors supplied.
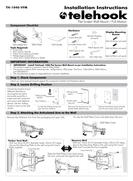
Component Checklist
Coach Bolt (x2)
Concrete Anchor (x2)
M4/5 Spacer (x4)
Security Screw (x1)
3mm Allen Key
M4x16/25mm (x4 each)
M5x16/25mm (x4 each)
M6x16/30mm (x4 each)
Installation Instructions
TH-1040-VFM
Flat Screen Wall Mount / Full Motion
IMPORTANT INFORMATION:
Step 1. Check Components
Check you have received all parts against the component checklist and Hardware above.
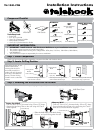
Step 3. Attaching the Articulated Arm to the Wall
! IMPORTANT - Install Telehook 1040 Flat Screen Wall Mount as per Installation Instructions.
! This product supports a maximum load of 25kg (55lbs).
! This product supports VESA mounting hole configurations: VESA plate, 75x75mm, 100x100mm, 200x100mm,
and 200x200mm.
! The manufacturer accepts no responsibility for incorrect installation.
Display Mounting
Screws
Hardware
Tools Required:
Power Drill
•
6mm (0.25”) Drill Bit
•
10mm (0.4”) Masonry Drill Bit
•
Phillips-head Screwdriver •
13mm (0.5”) Socket Wrench or Shifter
•
Remove the Telehook Arm from the packaging and open fully.
Un-clip the Wall Plate Cover and slide down the arm.
M4/M5 Washers
(x4 each)
M6/8 Spacer (x4)
Articulated Arm
VESA Plate
- Drill two 6mm (0.25”) diameter holes, 50mm (2”) deep.
Timber Stud Wall
OR
Drill Guide
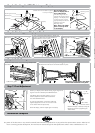
Step 2. Locate Drilling Position
Choose the location of your
Telehook Wall Mount,
ensuring that the wall is
structurally sound (for a
timber stud wall, locate the
stud using a stud detection
device). Use the Drilling
Guide to mark out the hole
centres.
WALL
Double-sided
tape (x2)
Un-fold the Drilling Guide and
open the Dust Collector.
Peel away the backing from the
double-sided adhesive tape.
Position the Drilling Guide vertically
onto the wall using a Spirit Level.
Dust Collector
Drilling Guide
FRONT
Top
Drilling Guide
BACK
Coach Bolt (x2)
- Secure the Mounting Plate to the wall using the Coach
Bolts supplied.
Slide the Wall Plate Cover back along
the arm, and push flat against the wall.
Concrete Anchor (x2)
Wall Plate Cover


Find Your Products By Category
- Communications
- Photography
- Portable Media
- Home Audio
- Kitchen Appliance
- Computer Equipment
- TV and Video
- Cell Phone
- Household Appliance
- Video Game
- Laundry Appliance
- Musical Instruments & Equipment
- Power Tools
- Automotive
- Car Audio and Video
- Outdoor Cooking
- Marine Equipment
- Lawn and Garden
- Personal Care
- Fitness & Sports
- Baby
Please Login
