
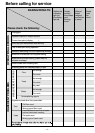
4.3
Owner's of the Panasonic Bread Maker Panasonic Automatic Bread Maker gave it a score of 4.3 out of 5. Here's how the scores stacked up:
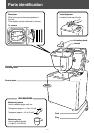
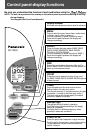
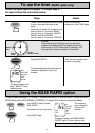

MENU
START
STOP
— 11 —
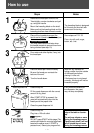
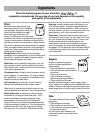
Follow the previous steps 1
-
7.
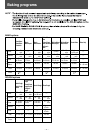
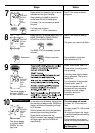
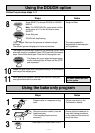
Using the DOUGH option
Using the bake only program
Steps Notes
Press SELECT to choose DOUGH or DOUGH
RAISIN.
The display will go out when the beeper stops,
but the indicating light will flash until the STOP
pad is pressed.
Dough will flash.
The resting settles the
temperature of the bread pan
and ingredients.
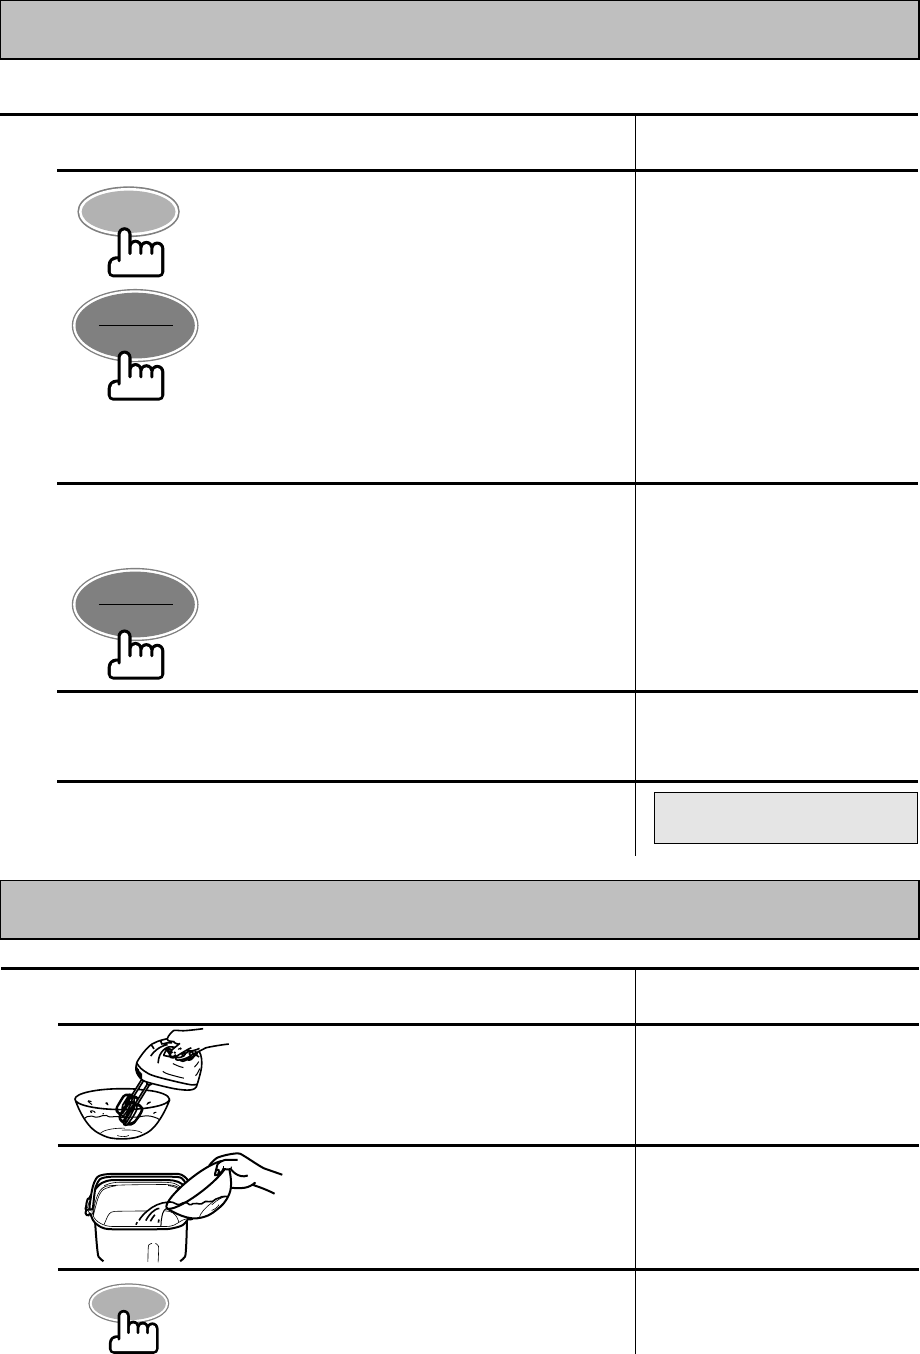
Prepare cake in a separate mixing
bowl.
Follow instructions in the
Cookbook for details.
Press Start pad.
DOUGH will stop flashing.
Note: For PIZZA DOUGH, press select until the
arrow points at it. You do not have to press
SELECT.
REST begins. After rest, the process to make the dough
will begin.
The remaining time is displayed in hours and minutes.
The beeper will sound eight times and the indicating light will flash
when the dough is completed. Press STOP pad when the beeper
stops. Remove the bread pan. Close the lid. Unplug after use.
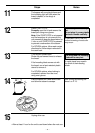
8
9
Shape and give dough final rising before baking in a conventional
oven as per the recipes given.
10
When baking is completed, remove from the oven, using your
oven gloves and cool on a wire rack.
11
The timer cannot be used
for this option.
Place the mixture carefully into the
lined bread pan.
(The kneading blade must be
removed.)
Ensure that the bread pan is
lined with baking parchment
so the cake mixture does not
touch the sides.
Steps Notes
1
2
Press select to choose BAKE ONLY.
3
SELECT
START
STOP


Find Your Products By Category
- Communications
- Photography
- Portable Media
- Home Audio
- Kitchen Appliance
- Computer Equipment
- TV and Video
- Cell Phone
- Household Appliance
- Video Game
- Laundry Appliance
- Musical Instruments & Equipment
- Power Tools
- Automotive
- Car Audio and Video
- Outdoor Cooking
- Marine Equipment
- Lawn and Garden
- Personal Care
- Fitness & Sports
- Baby
Please Login
