
3.8
Owner's of the Magnavox VCR ZV427MG9 gave it a score of 3.8 out of 5. Here's how the scores stacked up:

81EN 81EN
Recording Playback Editing
Introduction
Connections Basic Setup Function Setup VCR Functions
Others
Español
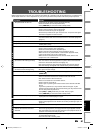
TROUBLESHOOTING
Before requesting service for this unit, check the table below for a possible cause of the problem you are experiencing.
Some simple checks or a minor adjustment on your part may eliminate the problem and restore proper operation.
Symptom Remedy
D
V
D
•
V
C
R
The power does not turn on. • Check that the AC power cord is connected securely.
• Check the breaker (in case of power failure).
• Press [TIMER SET] to cancel the timer standby mode.
There is no picture. • Re-connect the connecting cords securely.
• Check if the connecting cords are damaged.
• Check the connection to your TV (page 16).
• Switch the input selector on your TV (such as to “E1”) so that the signal
from the unit appears on the TV screen.
Cannot record a TV program. • This unit does not have a tuner to receive TV broadcasting.
• You must connect this unit to an external tuner to record TV programs
(page 13).
TV program pictures are distorted. • Check if all the connections are made correctly.
Playback picture is distorted. • Keep the device which may cause electrical disturbances, such as a
cellular phone, away.
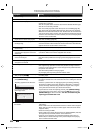
There is no sound. • Re-connect all connections securely.
• Check if the connecting cord is damaged.
• Check the connections to the amplifier input.
• Check if the input device setting on the amplifier is correct.
• When the unit is in pause mode or in slow-motion playback mode,
sound is not output. This is not a malfunction.
• When the unit is in fast forward or fast reverse mode, sound is not
output. This is not a malfunction.
Nothing was recorded even though
you set the timer setting correctly.
• There was a power failure during recording.
• The unit’s internal clock stopped due to a power failure that lasted for
more than 30 seconds. Reset the clock (page 23).
• The program contains copy protection signals that restricts copying.
• The timer setting overlapped with another setting that has priority.
Timer recording is not complete or
did not start from the beginning.
• The timer setting overlapped with another setting that has priority (page 31).
• Disc space was not enough.
Timer recording is impossible.
• Make sure
appears on the front panel display of this unit. If not, press
[TIMER SET].
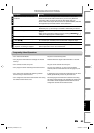
The remote control does not function. • Batteries are weak.
• There are obstacles between the remote control and the unit.
• The remote control is far from the unit.
• There are no batteries in the remote control.
• Check if the unit is turned on.
• Check if you are pointing the remote control at the recorder and NOT
the TV.
If you have a plasma TV, it may interfere with the IR signal. Try the
remote with the plasma off. If the remote works, you may need to move
the unit away from the plasma TV.
• Press [DVD] or [VCR], whichever you need. Then, try again.
• Press [TIMER SET] to cancel the timer standby mode.
The unit does not operate properly. • When static electricity, etc., causes the unit to operate abnormally,
unplug the unit and then plug it in again.
D
V
D
There is no picture. • If the main menu appears on the TV screen, press [RETURN] to exit.
• Check if the progressive scan mode is set correctly according to your TV
(page 76).
Picture noise appears. • Clean the disc with a cleaning cloth.
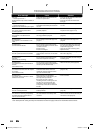
Playback picture from the external
devices connected to this unit is
distorted.
• If the picture output signal from the external devices passes through
this unit to get to your TV, the copy protection signal applied to some
DVD could affect the picture quality. Disconnect the playback device in
question and connect it directly to your TV.
There is no sound. • If you are using DIGITAL AUDIO OUTPUT (COAXIAL) jack, check the setting
in “Disc Audio” (pages 73-74).
• Clean the disc with a cleaning cloth.
E9E8BUD_ZV427MG9.indd 81E9E8BUD_ZV427MG9.indd 81 2008/03/27 13:32:452008/03/27 13:32:45


Find Your Products By Category
- Communications
- Photography
- Portable Media
- Home Audio
- Kitchen Appliance
- Computer Equipment
- TV and Video
- Cell Phone
- Household Appliance
- Video Game
- Laundry Appliance
- Musical Instruments & Equipment
- Power Tools
- Automotive
- Car Audio and Video
- Outdoor Cooking
- Marine Equipment
- Lawn and Garden
- Personal Care
- Fitness & Sports
- Baby
Please Login
