
3.8
Owner's of the Magnavox VCR ZV427MG9 gave it a score of 3.8 out of 5. Here's how the scores stacked up:

15EN 15EN
Recording Playback Editing
Introduction
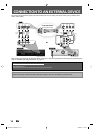
Connections
Basic Setup Function Setup VCR Functions
Others Español
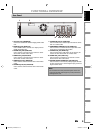
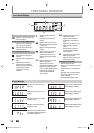
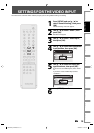
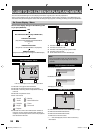
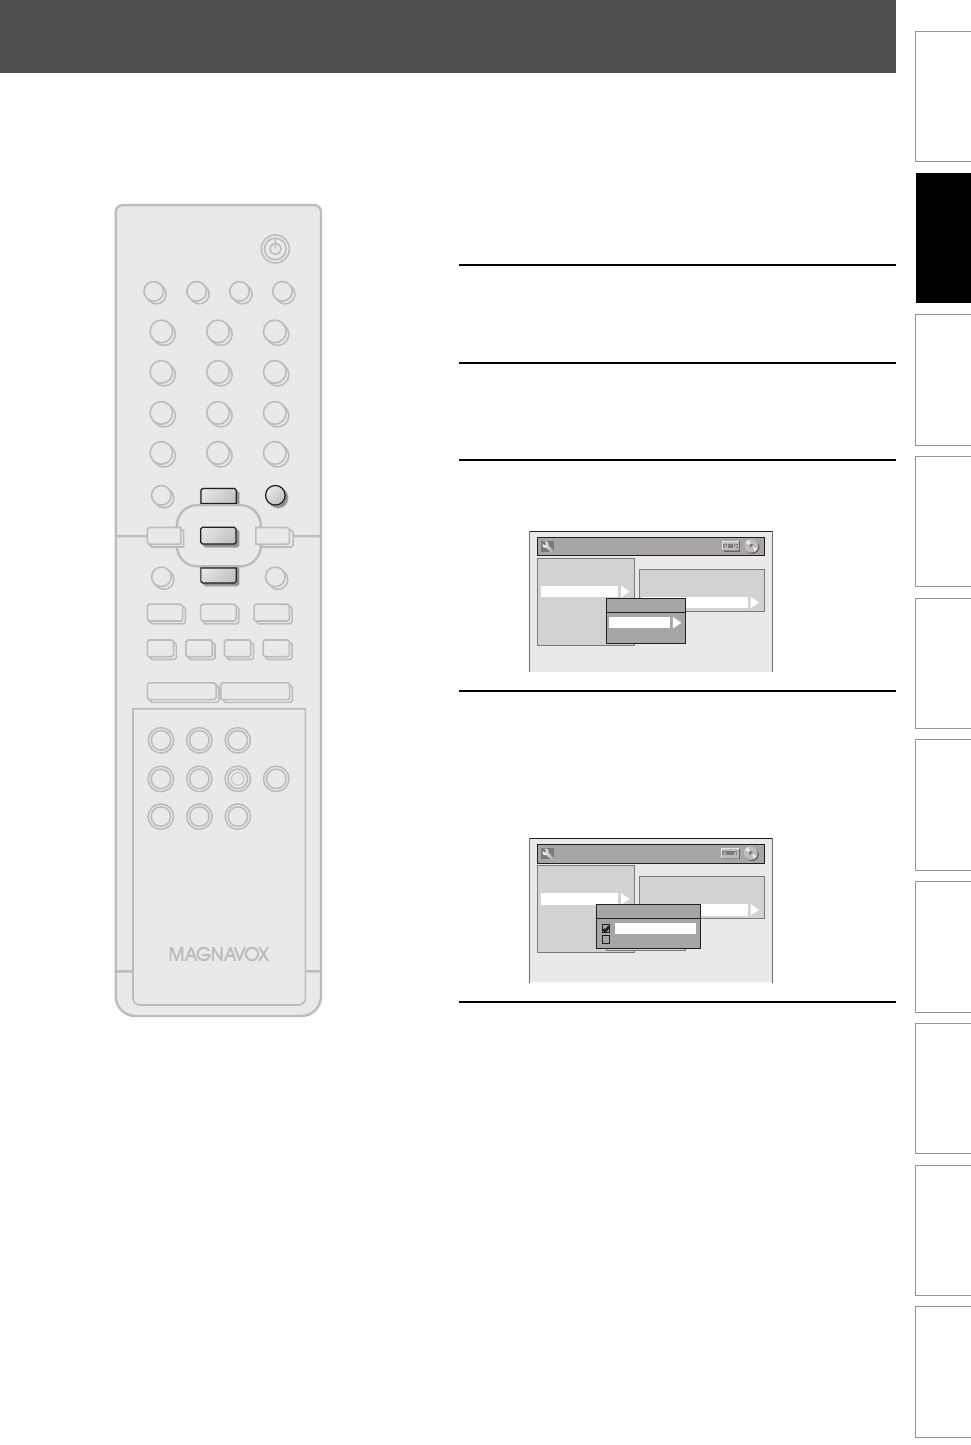
SETTINGS FOR THE VIDEO INPUT
You must let the unit know which video input jack you are using before making a recording.
1
Press [SETUP] and use [K / L] to
select “General Setting”, then press
[OK].
“General Setting” menu will appear.
2
Use [K / L] to select “Video”, then
press [OK].
Submenu will appear.
3
Use [K / L] to select “Video Input”,
then press [OK].
4
Use [K / L] to select desired external
input position, then press [OK].
General Setting
Playback
Display
Video
Recording
Clock
HDMI
Reset All
Progressive Scan
TV Aspect
Video Input
Video Input
E1 (Rear)
E2 (Front)
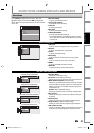
5
Use [K / L] to select the input jack
type to connect, then press [OK].
If you want to use VIDEO IN jack, select “Video
In”.
If you want to use S-VIDEO IN jack, select
“S-Video In”.
General Setting
Playback
Display
Video
Recording
Clock
HDMI
Reset All
Progressive Scan
TV Aspect
Video Input
Video Input
E1 (Rear)
E2 (Front)
E1 (Rear)
Video In
S-Video In
6
Press [SETUP] to exit.
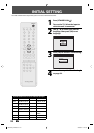
STANDBY-ON
TIMER SET
ABC DEF.@/:
JKL MNOGHI
TUV WXYZ
SPACETIMER CLEAR
SETUPDISC MENU
RETURNTITLE
TRACKING
VCRHDMI DVD
AUDIOREC
REC MODE D.DUBBING
CM SKIP
SEARCH RAPID PLAY
PQRS
SOURCE
123
456
78
0
OK
+--
o
p
B
B
iji
C
F
gh
s
9
DISPLAY OPEN/CLOSE
A
I
NB558
SETUP
p
o
OK
E9E8BUD_ZV427MG9.indd 15E9E8BUD_ZV427MG9.indd 15 2008/03/27 13:31:322008/03/27 13:31:32


Find Your Products By Category
- Communications
- Photography
- Portable Media
- Home Audio
- Kitchen Appliance
- Computer Equipment
- TV and Video
- Cell Phone
- Household Appliance
- Video Game
- Laundry Appliance
- Musical Instruments & Equipment
- Power Tools
- Automotive
- Car Audio and Video
- Outdoor Cooking
- Marine Equipment
- Lawn and Garden
- Personal Care
- Fitness & Sports
- Baby
Please Login
