

0
Owner's of the Humminbird Marine GPS System 4086301 gave it a score of 0 out of 5. Here's how the scores stacked up:
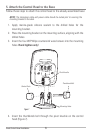


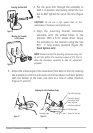
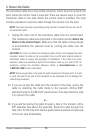
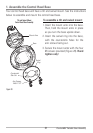

3. Put the pivot bolt through the assembly to
hold it in position and loosely install the nut,
but do NOT tighten the nut at this time (Figure
19).
CAUTION! Do not use a high speed driver on this
combination offasteners. Hand tighten only.
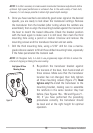
4. Align the mounting bracket transducer
assembly with the drilled holes in the
transom. With a 5/16" socket driver, mount
the assembly to the transom using the two
#10 - 1" long screws provided (Figure 20).
Hand tighten only!
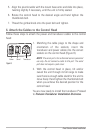
NOTE: Makesurethatthe mounting screws aresnug, but
do not fully tighten the mounting screws at this time to
allow the transducer assembly to slide for adjustment
purposes.
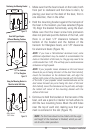
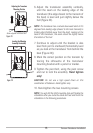
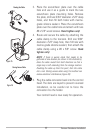
5. Adjust the initial angle of the transducer from back to front by rotating
the transducer until the side seam on the transducer is almost parallel
with the bottom of the boat, one click at a time in either direction
(Figure 21 and 22).
Adjusting theInitial Transducer Angle
Leading edge One click too low
Trailing edge
Correctly aligned
(transducer side
seam aligned
with boat bottom)
One click too high
Figure21
Figure22
Figure19
Inserting the Pivot Bolt
Figure20
Mounting theAssembly
to theTransom
14
Transom Transducer Installation


Find Your Products By Category
- Communications
- Photography
- Portable Media
- Home Audio
- Kitchen Appliance
- Computer Equipment
- TV and Video
- Cell Phone
- Household Appliance
- Video Game
- Laundry Appliance
- Musical Instruments & Equipment
- Power Tools
- Automotive
- Car Audio and Video
- Outdoor Cooking
- Marine Equipment
- Lawn and Garden
- Personal Care
- Fitness & Sports
- Baby
Please Login
