

0
Owner's of the Humminbird Fish Finder 409010-1 gave it a score of 0 out of 5. Here's how the scores stacked up:

29
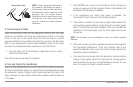
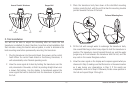
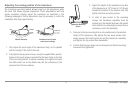
Transom Mount - Side Imaging®
• The hydrodynamic shape of your transducer allows it to point straight
down without deadrise adjustment.
• On boats with stepped hulls, it may be possible to mount the trans-
ducer on the step. Do not mount the transducer on the transom
behind a step to avoid popping the transducer out of the water at
higher speeds; the transducer must remain in the water for the
control head to maintain the sonar signal.
• If the transom is behind the propeller(s), it may be impossible to find
an area clear from turbulence, and a different mounting technique or
transducer type should be considered (see Trolling Motor
Transducer Installation).
• The Side Imaging® transducer must NOT have anything obstructing
the ‘view’ of the side looking beams, i.e. nothing can be in the line
of sight of these beams (not a hull, motor, or other transducer, etc).
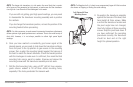
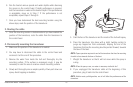
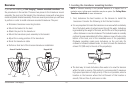
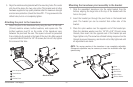
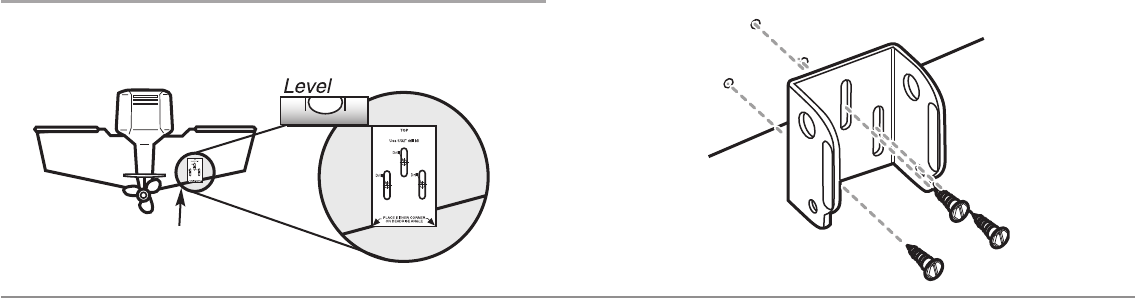
Mounting the transducer bracket to the boat
1. Remove the transducer mounting template from this manual. See
Appendix A for the Transducer Mounting Template.
2. Hold the template on the transom of the boat in the location where
the transducer will be installed. Align the template vertically,
matching the lower edge of the transom with the bottom corner of
the template. If your propeller moves clockwise as the boat moves
forward, mount the transducer on the starboard side, and use the
bottom left corner of the template. If your propeller moves counter-
clockwise as the boat moves forward, mount the transducer on the
port side, and use the bottom right corner of the template.
3. Using a pencil or punch, mark the three mounting holes on the
transom. Do not mark or drill any other holes at this time.
4. Using a 5/32" (4.0 mm) bit, drill the three holes to a depth of
approximately 1" (25 mm). On fiberglass hulls, it is best to use
progressively larger drill bits to reduce the chance of chipping or
flaking the outer coating. Use a marine-grade silicone sealant to fill
the drilled holes.
Attaching the Bracket
15” (380 mm) from prop(s)


Find Your Products By Category
- Communications
- Photography
- Portable Media
- Home Audio
- Kitchen Appliance
- Computer Equipment
- TV and Video
- Cell Phone
- Household Appliance
- Video Game
- Laundry Appliance
- Musical Instruments & Equipment
- Power Tools
- Automotive
- Car Audio and Video
- Outdoor Cooking
- Marine Equipment
- Lawn and Garden
- Personal Care
- Fitness & Sports
- Baby
Please Login
