
0
Owner's of the D-Link Marine Radio D-Link Unified Access Point Administrators gave it a score of 0 out of 5. Here's how the scores stacked up:

Unied Access Point Administrator’s Guide
Unied Access Point Administrator’s Guide
Page 14
March 2012
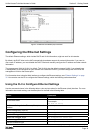
Section 2 - Getting Started
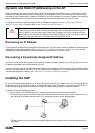
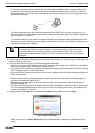
•) To use a direct-cable connection, connect one end of an Ethernet straight-through or crossover cable to the
network port on the access point and the other end of the cable to the Ethernet port on the PC, as shown in
the following gure. You can also use a serial cable to connect the serial port on the AP to a serial port on the
administrative computer.
For initial conguration with a direct Ethernet connection and no DHCP server, be sure to set your PC to a
static IP address in the same subnet as the default IP address on the access point. (The default IP address for
the access point is 10.90.90.91.)
If you use this method, you will need to recongure the cabling for subsequent startup and deployment of the
access point so that the access point is no longer connected directly to the PC but instead is connected to the
LAN (either by using a hub or directly).
Note: It is possible to detect access points on the network with a wireless connection. However,
we strongly advise against using this method. In most environments you may have no way
of knowing whether you are actually connecting to the intended AP. Also, many of the initial
conguration changes required will cause you to lose connectivity with the AP over a wireless
connection.
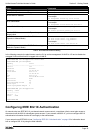
2.) Connect the power adapter to the power port on the back of the access point, and then plug the other end of the
power cord into a power outlet.
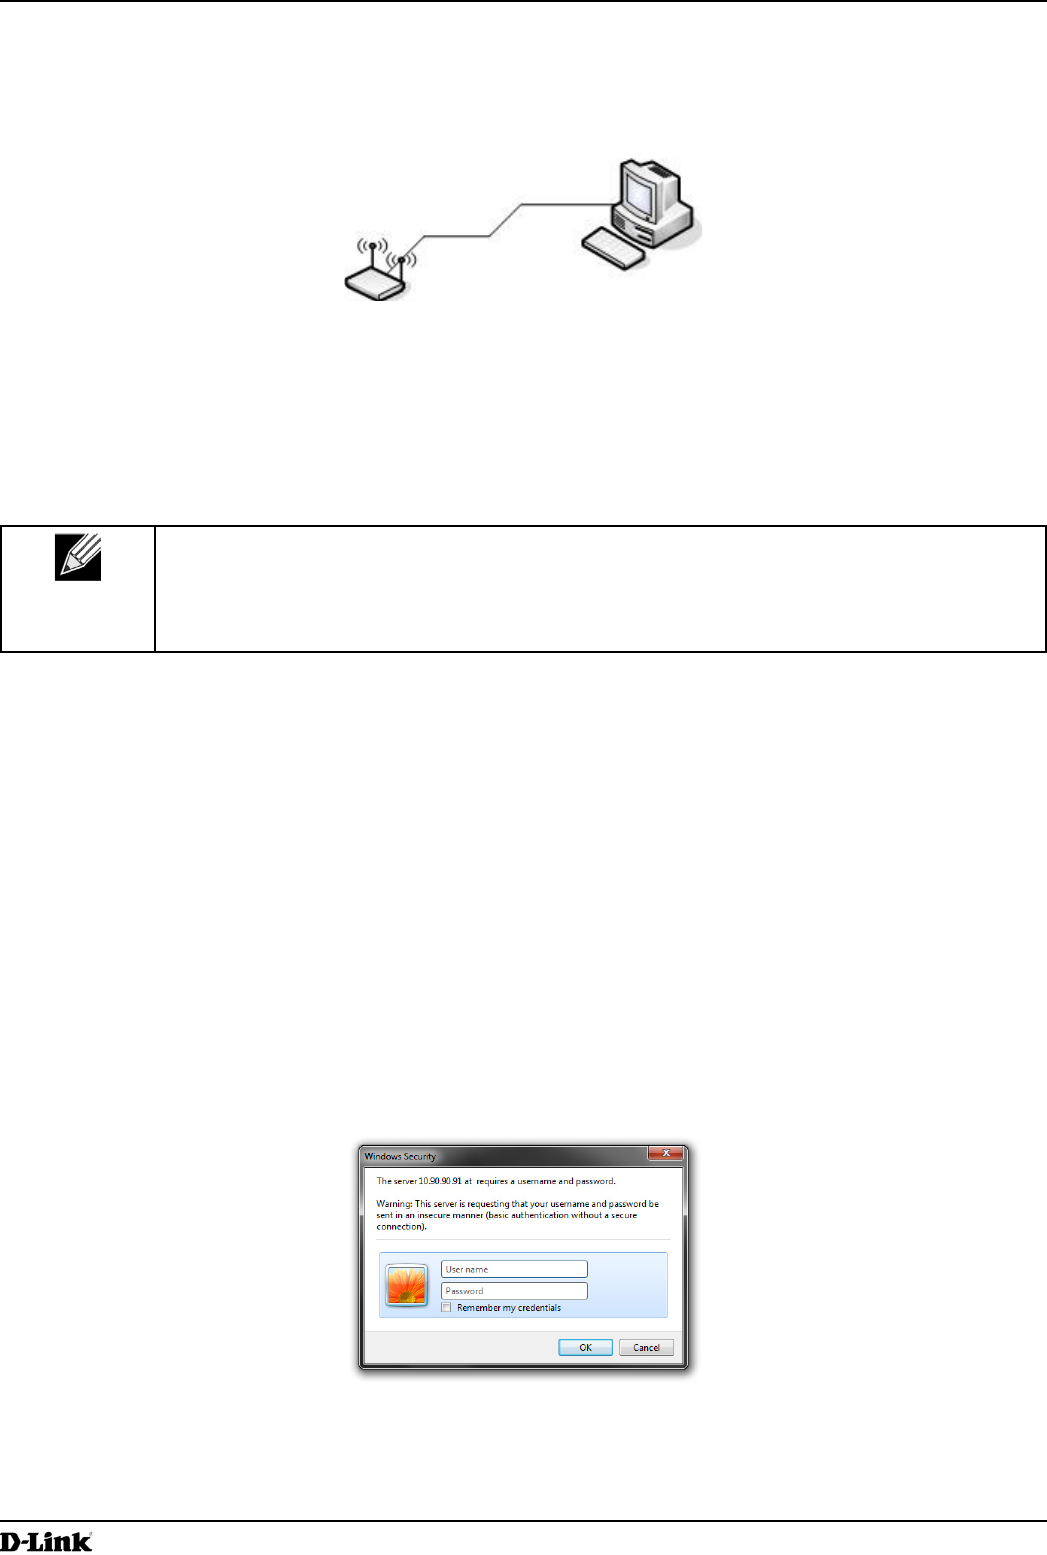
3.) Use your Web browser to log on to the UAP Administration Web pages.
•) If the AP did not acquire an IP address from a DHCP server on your network, enter 10.90.90.91 in the address
eld of your browser, which is the default IP address of the AP.
•) If you used a DHCP server on your network to automatically congure network information for the AP, enter the
new IP address of the AP into the Web browser.
•) If you used a DHCP server and you do not know the new IP address of the AP, use the following procedures to
obtain the information:
•) Connect a serial cable from the administrative computer to the AP and use a terminal emulation program to
access the command-line interface (CLI).
•) At the login prompt, enter admin for the user name and admin for the password. At the command prompt,
enter get management.
•) The command output displays the IP address of the AP. Enter this address in the address eld of your browser.
For a more detailed explanation about how to log on to the CLI by using the console port, see “Using the CLI
to View the IP Address” on page 24.
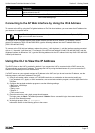
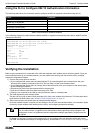
4.) When prompted, enter admin for the user name and admin for the password, then click Logon.
Figure 2 - Web UI Login Prompt
When you rst log in, the Basic Settings page for UAP administration is displayed, as the following gure
shows.


Find Your Products By Category
- Communications
- Photography
- Portable Media
- Home Audio
- Kitchen Appliance
- Computer Equipment
- TV and Video
- Cell Phone
- Household Appliance
- Video Game
- Laundry Appliance
- Musical Instruments & Equipment
- Power Tools
- Automotive
- Car Audio and Video
- Outdoor Cooking
- Marine Equipment
- Lawn and Garden
- Personal Care
- Fitness & Sports
- Baby
Please Login
