
0
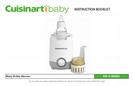
Owner's of the Cuisinart Bottle Warmer BW-10 gave it a score of 0 out of 5. Here's how the scores stacked up:
4
BEFORE THE FIRST USE
Carefully unpack the unit and remove any
packaging and promotional labels in or on
the bottle warmer. Rinse all accessories
thoroughly in warm soapy water.
OPERATION
To warm your baby’s bottle or food, please
follow the instructions and the chart below.
NOTE: These instructions are to be used
as a guide only. Please note that there are
many variables, such as size of the bottle and
starting temperature of the food, which can
affect the speed at which this unit warms the
bottle or jar as well as the nal temperature.
Adjustments to the instructions below may be
necessary. Always test the temperature of
food before feeding baby.
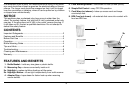
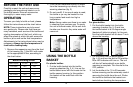
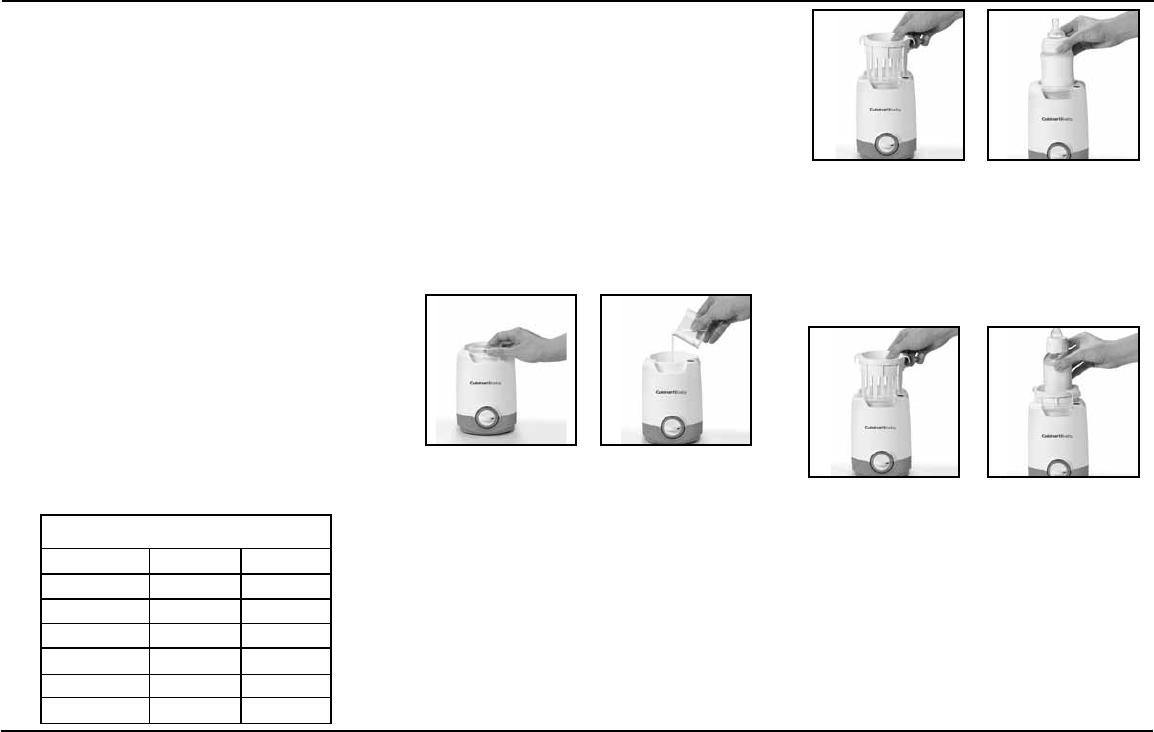
1. Remove the measuring cup from the front
of the housing (g. 1) and ll it with water
to the appropriate ll line, according to
the chart below.
2. Pour the pre-measured amount of water
from the measuring cup directly into the
warming chamber (g. 2).
3. Do not overll. If too much water is used,
the bottle or jar may be heated for too
long a period and reach too high a
temperature.
Note: Always make sure there is no water
in chamber from previous use. To empty
the unit of leftover water, tilt the unit onto
its side over the sink. Any extra water will
come out.
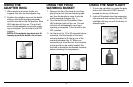
USING THE BOTTLE
BASKET
For plastic bottles
1. Put the bottle basket into the bottle-
warming chamber (g. 3, 4). Line up the
bottle basket arms with the insets on the
bottle warmer housing. In this position
the basket will be even/ush with the
housing.
For glass bottles
1. Put the bottle basket into the bottle
warming chamber (g. 5, 6) and turn
the bottle basket to a 45-degree angle
(basket will slide into place). In this posi-
tion the bottle basket will sit about 1 inch
above the housing.
2. Put the bottle into the bottle basket
(g. 4, 6) and turn the dial to ON position.
Blue LED indicator will turn on. The unit
will shut off automatically once bottle
warming is complete. Turn the dial to the
OFF position.
3. Let the bottle sit for 15 to 30 seconds
before removing and be extremely careful
removing the bottle from the unit. Shake
the bottle to distribute the heated con-
tents before checking the temperature.
Bottle Warming Guide
Bottle Capacity 5˚C/40ºF 20˚C/70ºF
4 oz Plastic 10ml 8ml
8.9 oz Plastic 10ml 8ml
4 oz Glass 14ml 8ml
8.9 oz Glass 14ml 8ml
Baby Food 4 oz. 12ml 8ml
Baby Food 6 oz. 12ml 8ml
5
3
6
4
1 2


Find Your Products By Category
- Communications
- Photography
- Portable Media
- Home Audio
- Kitchen Appliance
- Computer Equipment
- TV and Video
- Cell Phone
- Household Appliance
- Video Game
- Laundry Appliance
- Musical Instruments & Equipment
- Power Tools
- Automotive
- Car Audio and Video
- Outdoor Cooking
- Marine Equipment
- Lawn and Garden
- Personal Care
- Fitness & Sports
- Baby
Please Login
