
0
Owner's of the APC Home Security System NetBotz gave it a score of 0 out of 5. Here's how the scores stacked up:


124NetBotz Appliance User’s Guide
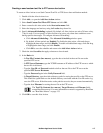
8. In the Advanced tab:
a. If you do not want e-mail notifications sent when sensor readings return to a normal state,
check Do Not Send Return-To-Normal Messages.
b. To include only the header information necessary to ensure delivery of the e-mail message,
check Minimize Header Usage.
c. Specify a Message Size Limit (bytes) for e-mail messages generated by this alert action.
d. Click to Send Both HTML and Plain Text Message.
9. Click OK to save this Alert Action.
Creating a send SNMP v1 trap alert action
To create an Alert Action to use Send SNMP v1 Trap alert notification:
1. Double-click the Alert Actions icon.
2. Click Add... to open the Add Alert Action window.
3. Select Send SNMP v1 Trap and click OK.
4. Enter a name for this alert action in Alert action name.
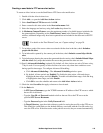
5. Specify Advanced Scheduling (optional). By default, all Alert Actions are active 24 hours a day,
7 days a week. You can specify an Alert Action to be active only when alert conditions occur
during specific time ranges. To configure Advanced Scheduling:
a. Click Advanced Scheduling.... The Advanced Scheduling window opens.
b. By default, all time periods are Enabled. To disable the alert action, click-and-drag to
highlight the time range, and click Disable. To enable a disabled time range, click-and-drag
to highlight the time range, and click Enable.
c. Click OK to save the schedule and return to the Add Alert Action window.
6. Check the alert Severities that apply to buttons to be activated.
7. In the Basic tab, type in the Target Host Address field the Hostname or IP address of the SNMP
based management system, and the Community String field the target-specific community
string used when sending traps to the Target Host Address.
8. In the Advanced tab, enter the Trap Port Number.
9. Click OK to save this Alert Action.


Find Your Products By Category
- Communications
- Photography
- Portable Media
- Home Audio
- Kitchen Appliance
- Computer Equipment
- TV and Video
- Cell Phone
- Household Appliance
- Video Game
- Laundry Appliance
- Musical Instruments & Equipment
- Power Tools
- Automotive
- Car Audio and Video
- Outdoor Cooking
- Marine Equipment
- Lawn and Garden
- Personal Care
- Fitness & Sports
- Baby
Please Login
