
0
Owner's of the Alesis Drums DM10 gave it a score of 0 out of 5. Here's how the scores stacked up:

23
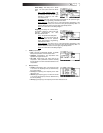
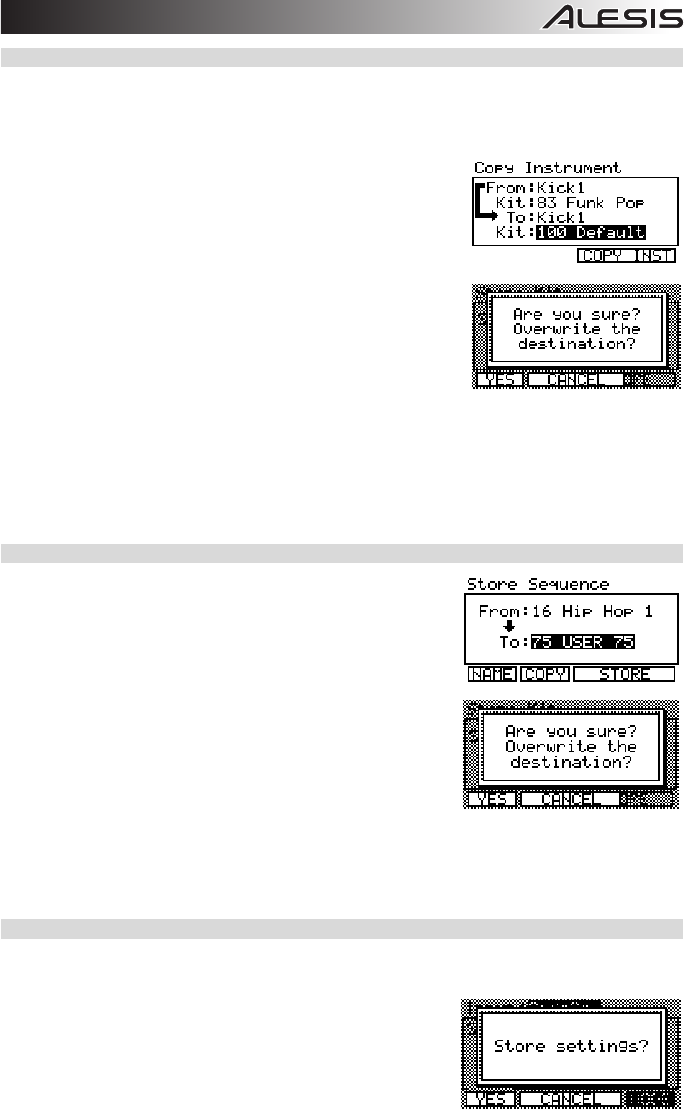
COPYING INSTRUMENTS
This page allows you to copy an Instrument from one Kit to an Instrument in another Kit. (You can also copy
it to the same Kit, which effectively stores that Instrument in that Kit.)
Use the CURSOR UP / DOWN buttons to select the field you want to edit, and use the VALUE UP / DOWN
buttons or VALUE DIAL to select a new entry in that field.
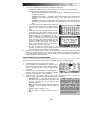
1. Press DRUM KIT to enter the main screen.
2. Press STORE. A new page will ask you to select DRUM KIT (F1
or F2) or INSTRMENT (F3 or F4).
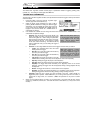
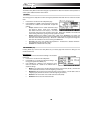
3. Press INSTRMENT (F3 or F4). A new page titled "Copy
Instrument" will appear.
4. Make sure the "Copy" field is selected then select the trigger
whose Instrument you want to copy.
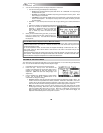
5. Select the "From" field.
6. Select the Kit that contains the Instrument you want to copy.
7. Select the "To" field.
8. Select the trigger where you want to copy the Instrument in the
"Copy" field.
9. Select the "To" field then select the Kit where you want to copy the
Instrument in the "Copy" field. You can copy it to any Kit, though
there are 100 empty User Kit slots (#100-199) to choose from. Copying an Instrument over an existing
one will overwrite it.
Note: By default, the "Copy" and "To" fields and "From" and "User" fields will initially contain the same
settings so you can quickly store changes to the Instruments in your current Kit.
10. Press STORE (F3 or F4).
11. A window will appear asking you to confirm your choice. Press CANCEL (F2 or F3) to cancel storing
the Kit. Press YES (F1) to store it.
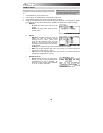
STORING SEQUENCES
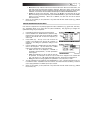
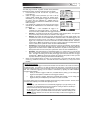
1. Press SEQ to enter the main Sequence page.
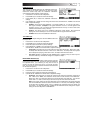
2. Press STORE. A new page titled "Store Sequence" will appear.
3. Use the CURSOR UP / DOWN buttons to highlight the "From"
field of the window.
4. Use the VALUE UP / DOWN buttons or VALUE DIAL to select
the Sequence you want to store.
5. Use the CURSOR UP / DOWN buttons to highlight the "To" field
of the window.
6. Use the VALUE UP / DOWN buttons or VALUE DIAL to select a
location to store the Sequence. You can store it in any
Sequence number, though there are 25 empty User Sequence
slots (#75-99) to choose from. Storing a Sequence over an
existing one will overwrite it.
Note: By default, the "To" field will initially contain the same Sequence number as the "From" field so
you can quickly store changes to the current Sequence.
7. Press STORE (F3 or F4).
8. A window will appear asking you to confirm your choice. Press CANCEL (F2 or F3) to cancel storing
the Sequence. Press YES (F1) to store it.
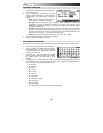
STORING TRIGGER SETTINGS
Any changes you make to the parameters in the Ext. Trig Menu will remain for the current session but will
return to their defaults if you turn off the module. We recommend storing your settings when you change
them so you can use them in future sessions.
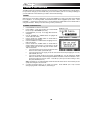
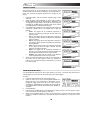
To store Ext. Trig settings:
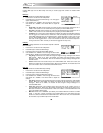
1. Be sure you are in the Ext. Trig Menu by pressing EXT TRIG.
2. Press STORE.
3. A window will appear asking you to confirm your choice. Press
CANCEL (F2 or F3) to cancel storing your Ext. Trig settings.
Press YES (F1) to store them.


Find Your Products By Category
- Communications
- Photography
- Portable Media
- Home Audio
- Kitchen Appliance
- Computer Equipment
- TV and Video
- Cell Phone
- Household Appliance
- Video Game
- Laundry Appliance
- Musical Instruments & Equipment
- Power Tools
- Automotive
- Car Audio and Video
- Outdoor Cooking
- Marine Equipment
- Lawn and Garden
- Personal Care
- Fitness & Sports
- Baby
Please Login
