
0
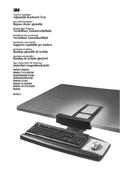
Owner's of the 3M Computer Keyboard Adjustable Keyboard Tray gave it a score of 0 out of 5. Here's how the scores stacked up:

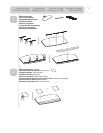
Montageanleitung
Montage-instructies
Assembly Instructions
Instructions d’assemblage
Instruções de montagem
Monteringsanvisning
Istruzioni di Montaggio
Instrucciones de montaje
Problembehandlung
Problemen oplossen
Troubleshooting
Dépannage
Resolução de problemas
Problemlösning
Risoluzione dei problemi
Solución de problemas
6
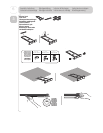
Routing Cables
Cheminement de çâbles
Kabelführung
Vervoerkabels
Cavi di comunicazione
Enrutamiento de los cables
Acondicionar os cabos
Linjekablar
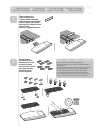
REMOVING COMMAND
™
FASTENERS
ENTFERNUNG DER COMMAND
™
KLEBESTREIFEN
COMMENT ENLEVER LES PINCES COMMAND
™
VERWIJDEREN COMMAND
™
HECHTMIDDEL
6 in.
(15 cm)
4
-
0
8
-
:
-
"
/
(
;
"
"
.
%
&
-
*
$
"
5
&
.
&
/
5
-
"
/
(
4
"
.
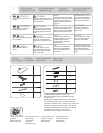
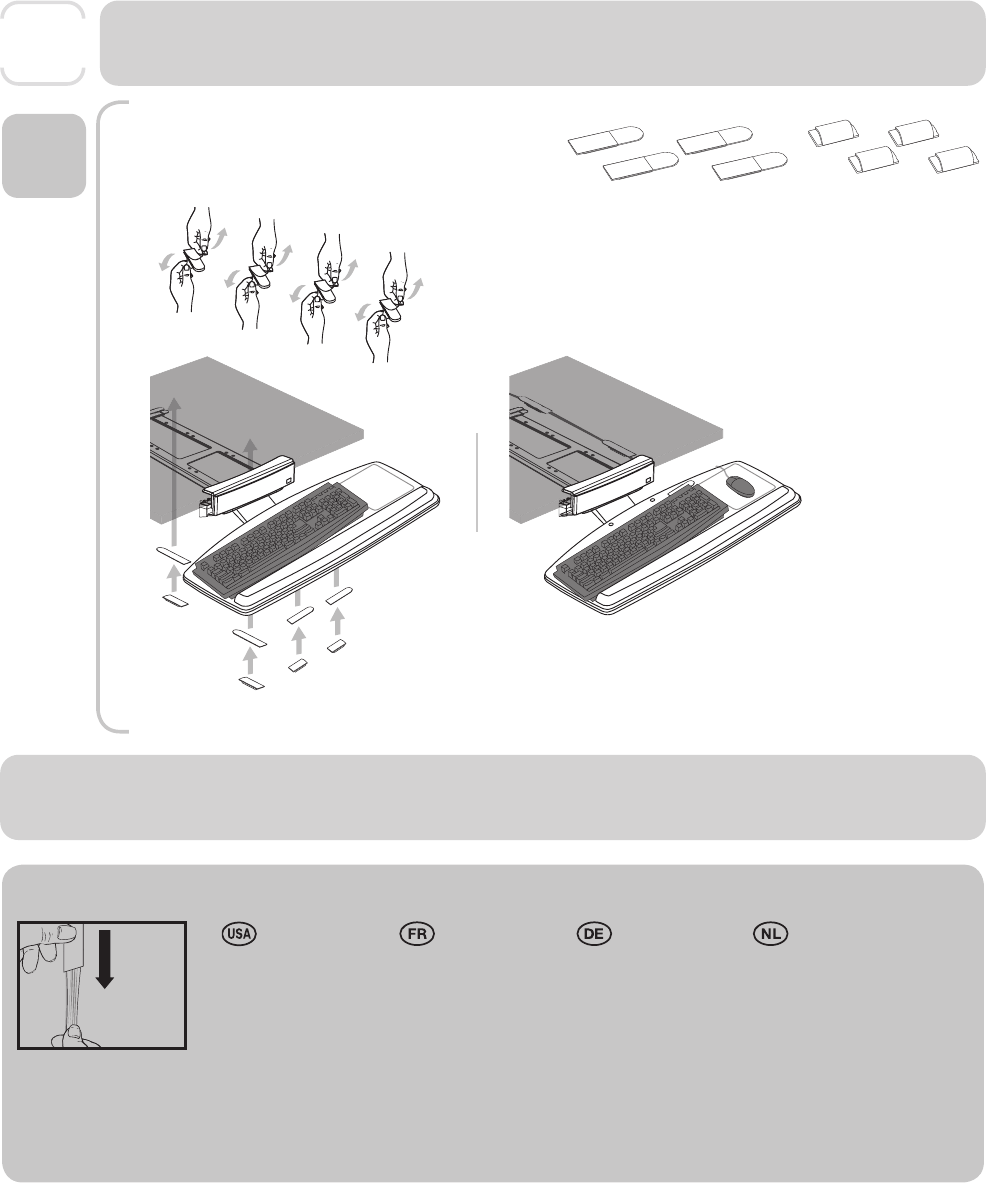
1. To prevent fastener from snapping
your fi ngers, LIGHTLY PRESS TOP
OF STRIP as shown.
2. SLOWLY slide the tab STRAIGHT
AGAINST THE SURFACE, stretching
at least 6 inches (15 cm) until the
strip releases. DO NOT pull tab out
at an angle! Strip could break or
damage surface. Repeat for
other fasteners.
1. De peur que la pince n'attraque
vos doigts, APPUYEZ LÉGEREMENT
AU-DESSUS DE LA BANDE tel
qu'illustré.
2. Faites délicatement glisser l'onglet
TOUT DROIT CONTRE LA SURFACE
sur au moins 15 cm jusqu'à ce
que la bande soit libérée. NE
TIREZ PAS l'onglet vers un angle!
La bande pourrait rompre ou
endommager la surface. Faîtes
autant pour les autres pinces.
1. Den STREIFEN WIE ABGEBILDET
leicht andrücken, damit er nicht
auf die Finger schnalzt.
2. Den KLEBSTREIFEN entlang der
Oberfl äche mindestens 15 cm
herausziehen, bis er sich löst.
NICHT in einem Winkel abziehen!
Dabei könnte der Klebstreifen
brechen oder beschädigt werden.
An den anderen Klebstreifen
wiederholen.
1. Om te voorkomen dat de
hechtmiddel afbreekt in uw hand,
kunt u zoals wordt aangegeven
ZACHTJES DE TOP VAN DE STRIP
INDRUKKEN.
2. Glij de tab LANGZAAM RECHT
TEGEN DE OPPERVLAKTE,
tenminste 6 inch (15 cm)
oprekken totdat de strip loslaat.
Trek de tab er NIET haaks op!
Strip kan breken of oppervlakte
beschadigen. Doe hetzelfde voor
andere hechtmiddelen.
8


Find Your Products By Category
- Communications
- Photography
- Portable Media
- Home Audio
- Kitchen Appliance
- Computer Equipment
- TV and Video
- Cell Phone
- Household Appliance
- Video Game
- Laundry Appliance
- Musical Instruments & Equipment
- Power Tools
- Automotive
- Car Audio and Video
- Outdoor Cooking
- Marine Equipment
- Lawn and Garden
- Personal Care
- Fitness & Sports
- Baby
Please Login
